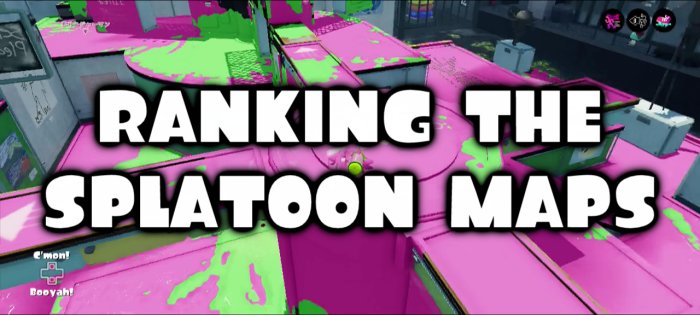
Yesterday, Nintendo re-confirmed that fan-favorite Splatoon map Moray Towers was returning in Splatoon 2. As you may recall, Moray Towers was one of the top three maps voted on for the final Splatfest last summer. In Nintendo’s tweet, they also asked what everyone’s favorite maps were. That inspired me to finish up my list of my favorites, which I started to write a while back.
This list is based on turf war mode, and I generally either play with a shooter or a roller. These rankings are not set in stone, and my opinions on some stages have changed over time. For maps that are ranked just a few spots apart, there may not be a huge difference between them. And of course, your opinions may vary. Feel free to comment with your favorites and least favorites at the bottom!
With all that said, here is my list. The maps are ranked from best to worst.
1. Kelp Dome
This large map has many rooms and lots of territory to ink. The large central area is often home to some tough battles, but sneaking into enemy territory is a lot of fun. The grated walkways provide some verticality, and each match here feels different. I enjoy playing this level pretty much equally with both shooters and rollers. I can’t kelp being excited when this stage is in the rotation.
2. Port Mackerel
This level has long corridors, and it has multiple lanes/alleys to take from the very start. The forklifts not only move back and forth, but climbing up them allows you to hop onto crates. The passageways are narrow, but there are many ways to go. Sneak through the right way and you can slip into enemy territory. I love using rollers in this map, as you can surprise opponents by squashing them when going around corners.
3. Piranha Pit
The conveyor belts here (mostly on ramps) provide a unique feature to this map. But I think it’s the sheer size of the map that draws me to it. It’s huge, with lots of turf waiting to be inked. The central section is often a violent combat zone, but watch the map and you may be able to spot a great place to run off and just lay down some ink.
4. Moray Towers
I think Moray Towers is a map that you either love or hate. Personally, I love it; it’s been one of my favorites since it was released as DLC. You can dive straight into battle, or you can score a lot of turf running up and down the ramps. Getting past the center square can be tough at times, but it’s quite rewarding when you do. However, it can be frustrating at times, when a well-protected sniper camps out and your teammates don’t (or can’t) help take him or her down.
5. Flounder Heights
The tall apartment buildings here give this map a sense of height not seen in other maps. Moray Towers is tall, but it’s more spread-out and the height change is gradual. Here, you can go straight up as you scale the tall buildings. But it’s not just about height, there’s a lot of ground space as well, making this one of the larger maps in the game.
6. Museum d’Alfonsino
This museum stage is a work of art. The large rotating cylinders are the signature attraction here, and this is another huge map. I tend to prefer large maps, and Museum d’Alfonsino is one of my favorites.
7. Walleye Warehouse
The base areas on this map are very narrow, but the central section is quite wide. This was one of my favorite maps early on, before the DLC stages were added to the rotation. And it’s still one that I like a lot, despite it being one of the smaller maps. I’ve always loved the little side alleys for bypassing the central firefight and sneaking ahead into enemy territory.
8. Hammerhead Bridge
A bridge that is under construction is the setting for this level. It’s a long map, but fortunately it’s not as narrow and cramped as Arowana Mall. It has a top level, with platforms and grates you can walk across, as well as a solid lower level. This may be in the middle of the pack, but I enjoy this map quite a bit.
9. Blackbelly Skatepark
Honestly, I’m a bit surprised I’m ranking this so high. At one point, it was my 2nd least-favorite map. But that was early on, when I was still using a roller exclusively. Ironically, a roller isn’t a good fit in the skatepark. Some curved areas are too steep for the rollers to handle, and it’s harder just to get around when rolling. But once I started using a shooter, I gradually came to appreciate this map.
10. Saltspray Rig
This map takes place on a large oil rig, and it has a lower level and an upper level. There are two elevators you can use to move between them, or you can take the winding ramp paths. Of course, you can also jump from the upper level to the lower level. The largest piece of real estate is a large room on the upper level, far from both spawn points. The team that controls this area often (but not always) wins the match. It is a fun stage overall.
11. Bluefin Depot
This map is unique in that it doesn’t have one central battle area, but two–a left and a right, separated by a gap that cannot be jumped across. Both teams’ bases are on a higher level, and you can take either route into the central areas to make your way up to the other team’s base. This one requires you to keep your eye on the map, because you may be dominating one side of the map and then notice the other team has swept through the other side and has gone up into your base.
12. Urchin Underpass
This would be a good time to mention that I do like most maps in the game. So even though Urchin Underpass is fairly low on my list, it’s not a bad map and I do enjoy it most of the time. There are several ways to reach the central battle area, so you rarely feel pinned in.
13. Camp Triggerfish
I love the camp setting, and being out in nature gives this map quite a different feel from the urban and industrial settings of other stages. But with that said, I don’t like the layout of this map. It’s basically two large semi-circles, with only two places to cross over to the other side. And one of them isn’t even available until the final minute of battle. There are places to shoot across to the other side, but the layout encourages a predictable clockwise flow of squid movement. It is quite a large map though, and it can be fun at times, but it’s not one of my favorites overall.
14. Mahi-Mahi Resort
This tropical resort stage has an appealing atmosphere, and much of it takes place on floating platforms. There are many gaps where you can fall into the water, and you’re likely to die a lot…especially when you’re first learning the layout. Many of my worst fails took place on this map. Halfway through a match, the water recedes and more of the floor becomes available to ink (and walk on). While this map can be fun once in a while, it’s generally not a stage I hope to see in the rotation.
15. Arowana Mall
Arowana Mall is a long, narrow stage. The side corridors provide alternate routes to the opposing team’s bases, but you need to get past the congested central space to use them. I liked this level early on in Splatoon’s lifespan, but I began to dislike it more and more as time went on. Perhaps I just grew (permanently) sick of it. It’s a bit too narrow for my tastes.
16. Ancho-V Games
The final map released for Splatoon is also the smallest…and the worst. Most of the action takes place in the large central room, and the defining feature of this map are the propeller-powered platforms that raise (or move) when you shoot them with a solid stream of ink. This stage is very compact, and it often seems to end up with one team spawn camping the other. It’s far too small for its own good.
What Do You Think?
What about you? Feel free to leave a comment below with your favorites. Splatoon 2 is coming out soon… If you’d like to send me a friend request on Nintendo Switch, my friend code is 0442-0992-5516. I plan on making many Splatoon 2 videos, so please consider subscribing to my Youtube channel jvgsjeff if you’re interested in seeing those.
Related: 7 Things I’d Like to See in Splatoon 2 – Splatoon 2 Global Testfire
