Super Mario 3D World – World Crown

I’ve been playing a lot of Splatoon lately…so much that it’s kept me from completing the last world in Super Mario 3D World: World Crown. But I made it a priority to finish it off recently. And it definitely wasn’t easy, but I did it. While the previous two worlds didn’t have stamps in the levels, they returned for World Crown. This world only has three levels, but don’t be fooled. It provides a monster challenge and will probably take longer to complete than any previous world.

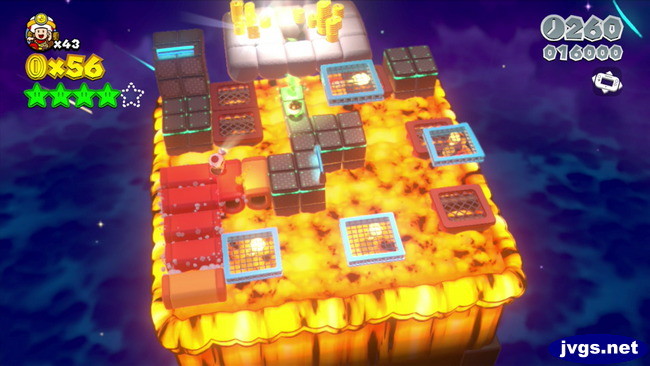
World Crown-Toad: Captain Toad’s Fiery Finale is the last (and most challenging) Toad level. A piranha plant near the center of the level will constantly shoot fireballs at you as you navigate across floating platforms above rising (and falling) lava. Some of the platforms are the kind that require you to blow into the gamepad microphone…as you’re rotating the camera and avoiding fireballs. This is quite a tricky level…but it’s nothing compared to what’s to come.

sm3dw-ct
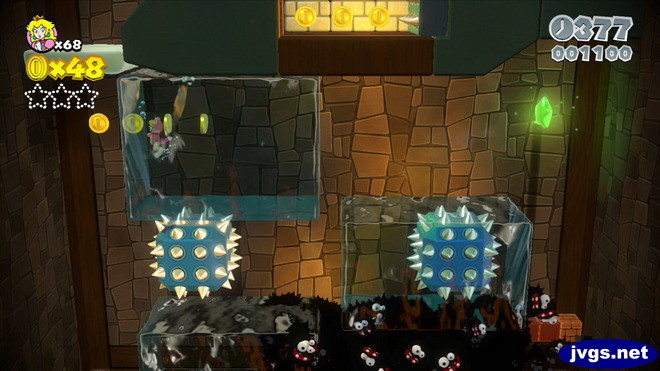
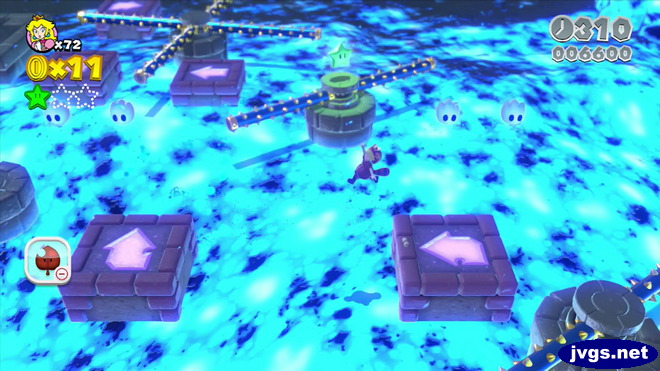
World Crown-Cube: Mystery House Marathon is set up like other previous “Cube” levels. You are presented with a series of short challenges (with 10 seconds to complete each one), and they are presented in rapid-fire succession. If you die or fail to collect a star before time runs out, you must start all over. And unlike previous Cube levels, this one has a whopping 30 challenges with 30 stars up for grabs. Some of the challenges are easy, some are hard, and many others only seem difficult until you figure out what to do. But doing everything in one go is what makes this level a beast. Lots of trial-and-error is required, and it took me many hours to clear this stage.

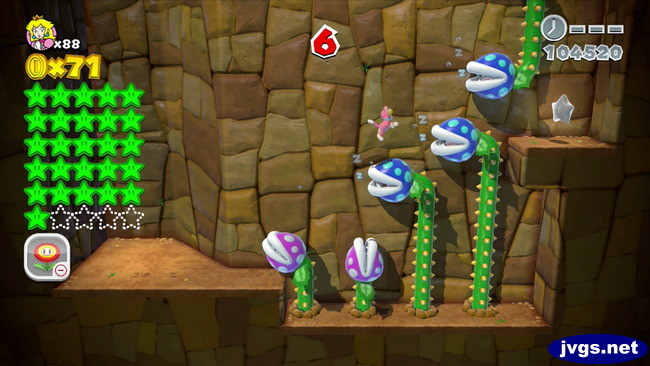
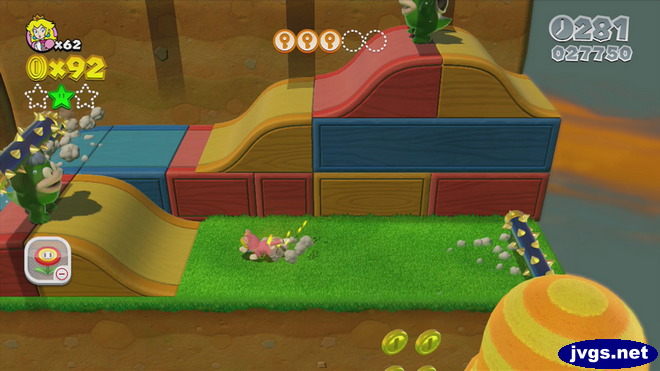
World Crown-Crown: Champion’s Road is the granddaddy of all challenges. This is the most difficult level in the game, and it has to be one of the most challenging Mario levels ever. It starts out with a platforming section, where you have to avoid cannonballs being spit out by enemies. There are also Fire Brothers and Chargin’ Chucks to contend with. You then warp to a section where you have to climb a bunch of beat blocks, which constantly alternate. Peach’s float move comes in handy here, but it’s still quite a challenge.

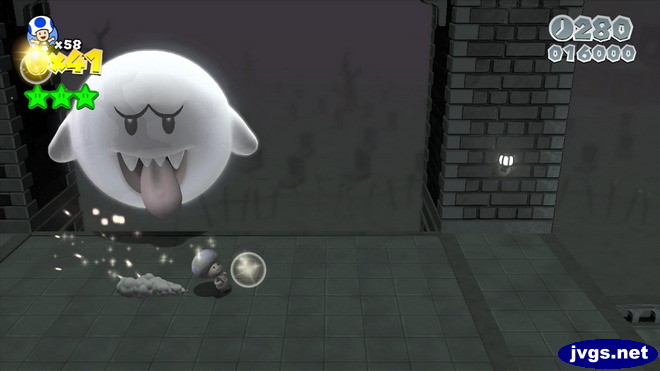
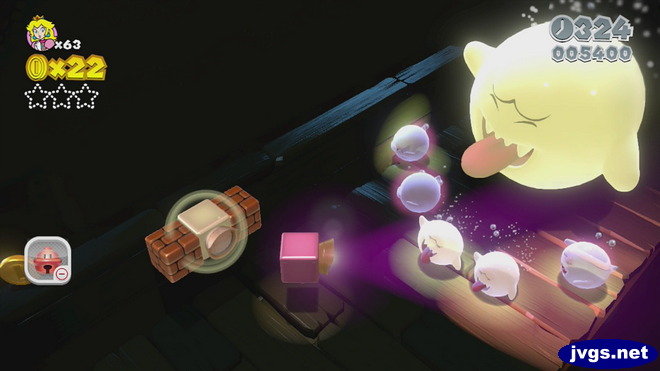
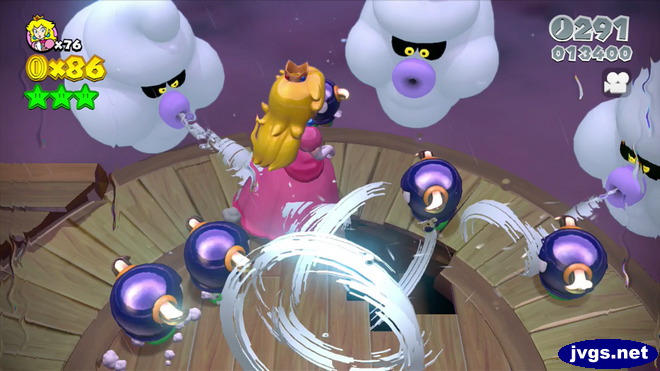
After an area with Magikoopas and blocks that fall when you stand on them, there is a section where you have to maneuver around swinging spiky cylinders while watching out for fuzzies. You then have to scale a wall by wall-jumping and bouncing off of enemies. A spring board gets you started, but this section is extremely difficult if you don’t have a cat suit.

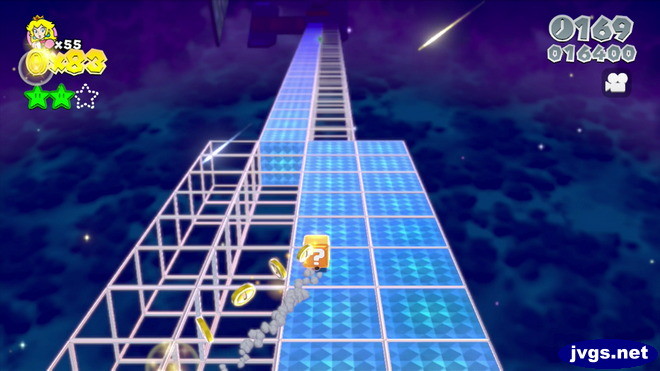
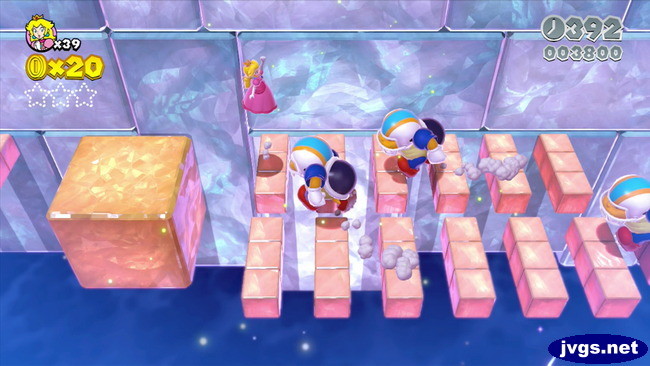
Clear all of that, and you’re taken to a high-speed area where you have to run and jump across speed boosts, while avoiding pulsing rings of electricity. If you can collect five keys and make it to the warp box, you’ve survived the worst of it. You have to go through a series of transparent pipes that spell out “THANK YOU.” They’re not hard, but it takes some time to go through them, so you’ll need ample time remaining.

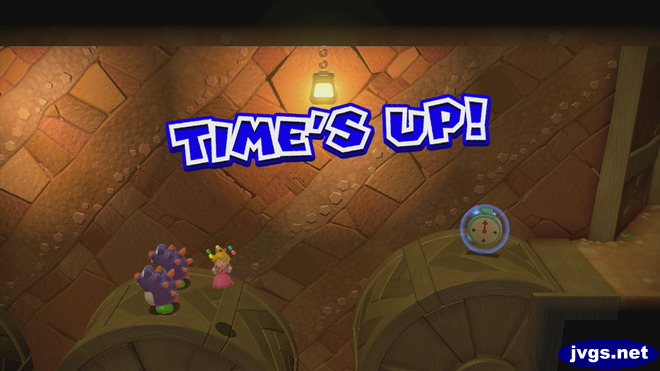
By the way, this level has no checkpoints. Die anywhere and it’s back to the very beginning. Each section is challenging and requires lots of practice. I don’t know how many hours I put into this level, or how many times I died here. But I’m sure my death count is easily in the triple-digit range. This level is brutal.

What a huge relief to get that done with. Looking at the stamps screen, I saw that I had all of the regular stamps. The only ones I didn’t have are the large character stamps you get for completing *every* level with that character. Since I’ve been using Peach for most of the game, I saw that I only needed to complete about a dozen more levels/mini-bosses to complete everything with her. Most of those were in earlier worlds (before I switched to Peach permanently), so it wasn’t very hard to do. That earned me the large Peach stamp.

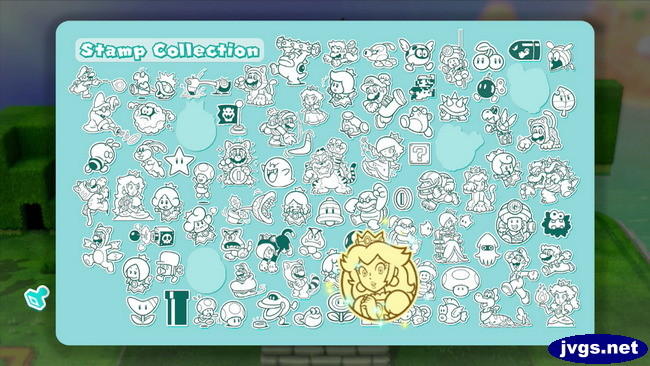
As for the others, let’s just say I don’t need the stamps that bad. Asking players to replay a game with four other characters to unlock trivial things such as stamps is a cheap way of artificially lengthening a game in my opinion. And I am so done with World Crown that I have no interest in playing it again anytime soon.

But don’t let my negative opinion of World Crown deter you from playing Super Mario 3D World, though. Overall, I’ve enjoyed Super Mario 3D World quite a bit. Stay tuned for my review in the near future. Update: The review is here.

Super Mario 3D World – World Flower

I continued my game in the third bonus world, World Flower. Just like World Mushroom before it, there are no stamps to collect in any of these levels.

World Flower-1: Switch Shock Circus has a bunch of switches that you must step on to change them from blue to yellow. All the while, the fizzlits (zappy blob enemies) are out to get you, as are some hammer brothers. This isn’t a level you can rush through, but if you take your time and walk carefully, it’s not that hard to clear.

World Flower-2: Floating Fuzzy Time Mine is a forced-scrolling level in which you must continually make your way upwards to escape the swarm of black fuzzies. You’ll need to swim through moving water cubes and avoid spike blocks as you ascend the stage. Some spinies can also be found in the upper parts of the level, many of them waiting just off-screen to attack you when you’re busy evading spike blocks. This level is quite a challenge just to get through, but the difficulty of the third star puts this stage over the top. One of the more frustrating levels in the game. I am definitely not a fan.

sm3dw-f2World Flower-3: Piranha Creeper Creek After Dark features rotating platforms and piranha creepers (the piranha plants that can extend out of their pipes). Just completing this stage can be a challenge, but getting the green stars is especially difficult. Each section of the level has a series of torches that need to be lit. The second star, in particular, will require you to make some tricky jump-and-shoot moves, while avoiding enemy fire and flying parabones, and being careful not to fall into the lake of poison. This is quite a challenging level.

World Flower-4: Faster Fort Fire Bros. features a return to World Castle-1, but with an extreme time limit. You have only 30 seconds to complete the level, although you can (and must) pick up clock icons along the way to extend your time. The short time limit doesn’t give you a lot of time for exploration, so even finding all of the green stars can take numerous attempts. It’s a challenge, but it’s not as frustrating as the previous level.

World Flower-5: Sprawling Savanna Rabbit Run has you returning to the huge, open grasslands where you chase bunnies. With the need for speed here, you’re going to want to use Toad. This is an easy, relaxing stage where you can take your time (when you’re not chasing bunnies). It provides a nice diversion from the rushing and frustration found in the other levels of this world.

World Flower-6: Shiftier Boo Mansion is a ghost house devoid of color. It’s all black-and-white in here as you ride conveyor belts and avoid the many big Boos. Much of what you see here isn’t real; there are phony flagpole exits and 1-ups. The real exit is a bit tricky to find, but otherwise this level is a ghostly breeze.

sm3dw-f6World Flower-7: Pipeline Boom Lagoon takes place primarily underwater, and you’ll be using the cannon box power-up to shoot cannonballs. I didn’t have much trouble here, as the middle stages of World Flower are significantly less challenging than the first few.

However, the difficulty ramps back up in a big way with World Flower-8: Blast Block Skyway. It’s a remake of World 4-3: Beep Block Skyway, but it’s much more difficult this time around. The pink and blue blocks still alternate; one will be solid when the other turns into just an outline. But they now switch at a rapid pace, pretty much faster than you can jump. This level has a lot of coins in it, so you’ll be earning some 1-ups. But if you’re like me, you’re going to be burning through them just as fast. I lost a lot of lives here. It’s the type of level that once you finish, you never want to see again.

sm3dw-f8World Flower-9: Tower Sunshine Seaside is a very odd, but beautiful, stage. Taking place on a gorgeous beach with the sun glimmering off of waves, you have to defeat several Fire Bros. to open the path to the goal. But those Fire Bros. are standing on top of extremely tall towers of Goombas! You only have 100 seconds to clear the level, but extra time icons are scattered around the level. Plenty of power-ups can be found here as well. It’s a bit of a challenge at first, but it’s a fun challenge. This is a unique and enjoyable level. Once again, you may want to use Toad here.

sm3dw-f9World Flower-10: Honeycomb Skyway provides a return to the top-down futuristic honeycomb seen in World Star-6. Boomerang suits located here let you shoot boomerangs at the piranha plants and other enemies as you make your way through the level. It’s an easy level; you just have to be patient enough to wait for your platforms to appear before going through any pipes.

World Flower-11: Spiky Spike Bridge Sneak has a series of spiky bridges (as the name implies), but there’s a twist this time. The spikes on most bridges here are only activated when you’re spotted by a giant spotlight. So you definitely want to avoid it as much as possible. The first half of this level is a breeze, but it gets trickier in the second half. It’s still not a bad level, though.

sm3dw-f11World Flower-12: Boss Blitz has you fighting five previous bosses all over again. You can fight them in any order you want, but you have to beat them all on one life of course, and you only have 500 seconds for the whole ordeal. And once you do beat all five, you then have another boss to defeat! The ridiculous time limit is the only thing that provides a challenge here; you have to learn how to beat these bosses very quickly to have a chance.

Here is a gameplay video of Boss Blitz.

Once I wrapped up those twelve levels, I unlocked the final world: World Crown. I’ll be headed there next time, so please join me again!

Super Mario 3D World – World Mushroom

After completing the bonus World Star in Super Mario 3D World, I continued on to the second bonus world, World Mushroom. This world is a fairly short world, with only eight levels. Each is a new take on an earlier level, and there are no stamps to collect in this world.

World Mushroom-1: Night Falls on Really Rolling Hills starts out with only 30 seconds on the timer! It’s clear you have to hurry, and picking up clock icons to give you more time is a must. You really don’t have time to explore and find all the stars on one run, so you’ll probably need multiple attempts to find everything.

World Mushroom-2: Spiky Mount Beanpole requires you to ascend a very tall structure in search of five key coins. Fortunately, this level has a reasonable time limit, so it’s more relaxing than the frantic running in the previous stage. Once you find all five key coins, you’ll have to return to the starting point before you can advance to the exit.

World Mushroom-3: Deep-Black Jungle Drift, as the name implies, takes place in a dark jungle. You’ll wear a light box (the spotlight power-up) as you ride rafts through haunted wetlands. Many Boos can be found here, which can be defeated by shining the spotlight on them for a few seconds. This is actually a pretty easy level.

World Mushroom-4: Trouble in Shadow-Play Alley is a colorless 2D level in which you only view silhouettes of practically everything in the level. You’re only given 100 seconds to complete the level, so again, you may feel rushed. But the level is fairly short, so it’s really just a matter of figuring out how to get the stars in time.

World Mushroom-5: Back to Hands-On Hall takes place in the same Japanese setting as World 6-3. Much like that stage, this one also makes heavy use of the touch screen on the gamepad. You’ll use your finger or stylus to swipe the screen to open doors and bang gongs. It’s not a bad level, but I lost a lot of lives using the propeller power-up, trying to get the second star.

World Mushroom-6: Gigantic Seasick Wreck has you walking across a broken ship, while avoiding the gusting winds of the cloudy Ty-Foo enemies. They’ll blow you overboard if you’re not careful. There are also some Bullies that will try to push you around. However, there are multiple mega mushrooms in this stage that let you turn the tables on the bad guys.

World Mushroom-7: Broken Blue Bully Belt is a challenging level that has some very tricky jumps. Platforms rise and sink over some blue lava, while enemies pop up and other spiky hazards spin around to make things even more difficult. There is a tanooki suit power-up here, but practice is going to be required to get through this stage.

World Mushroom-Cube has ten stars up for grabs. Each room has a ten-second time limit and a different group of enemies to defeat. Clearing each room earns you a star and a trip to the next room. It’s helpful to have a power-up here, particularly the cat suit. But it’s not that difficult regardless.

This still isn’t the end of the game, because World Mushroom leads right into another area, World Flower. So I’m not done yet!